
Changing a bike tire might seem easy. But trust me, it’s not. Instead, it’s one of the most struggling parts for a bike lover. Changing a bike tire is a hassle for any rider. And when it’s a dirt bike tire, the struggle is real!
Changing a dirt bike tire is a combination of two works. First, you have to take off your dirt bike entirely from the rim. And next, you’ve to install a new or another one.
To accomplish both of these tasks, you’ll require some specific tools, and need to follow some ways. Notably, the lack of the right tools and knowledge makes the job even more complicated.
So, this article is all about change dirt bike tire. In this article, we’ve compiled everything related to changing a dirt bike tire, from identifying a damaged tire to changing and installing a new one. So read the full article to know the easy and simples ways to do it.
How Often To Change Dirt Bike Tire?
The lifetime of a dirt bike tire is four years from their production date. After that, to be on the safer side, you should change them.
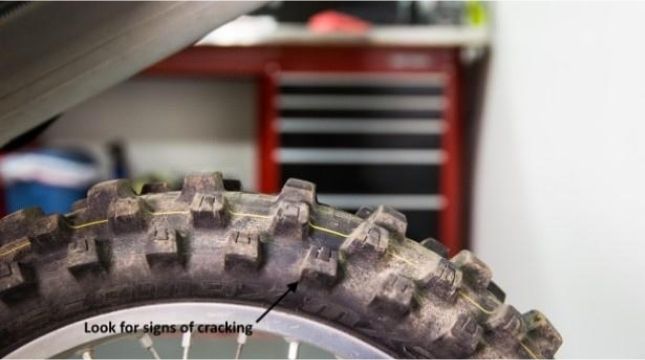
But that doesn’t mean they don’t need any checking. Your bike tires need to be taken care of as well. You should check if your bike tire has signs of the tired or broken tire like missings nobs, holes, overly tired out treads, cracks, and constant road noise.
Identifying A Damaged Tire
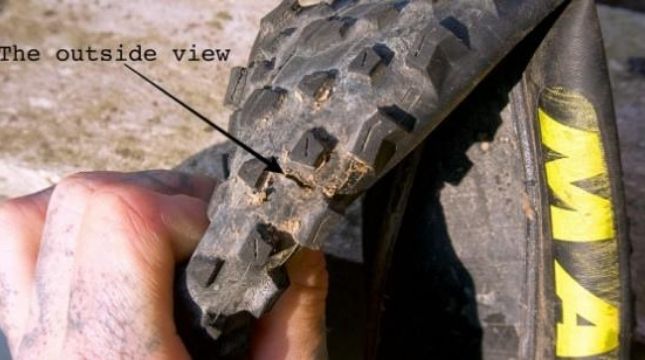
Identifying a worn-out or damaged tire is essential. This will help you to know that you’ve to change it. Here are some ways to identify them:
- Checking if there is any crack.
- Are all the nobs in the right condition.
- If there is any hole in the tire.
- Treads are working fine or not
- Brakes are working correctly or not.
If you see any of the indications in your tire, then your needs repairing. But if the condition is too severe, you’ve to change your dirt bike tire and replace it with a new one.
Changing A Dirt Bike Tire At Home
Changing a dirt bike tire is the most feared by motocross and off-road riders. As we know, practice makes things perfect, so we should give it a go to do it ourselves and be better at it.
Changing a dirt bike tire is troublesome. No biker wants to change the tire himself. But with some tools and simple ways, even you can do it in your home.
Tools.
First things first, we need handy tools to remove and change any dirt bike tire. But the regular tools won’t serve the purpose. There are specific tools with defined parameters for changing a dirt bike tire.
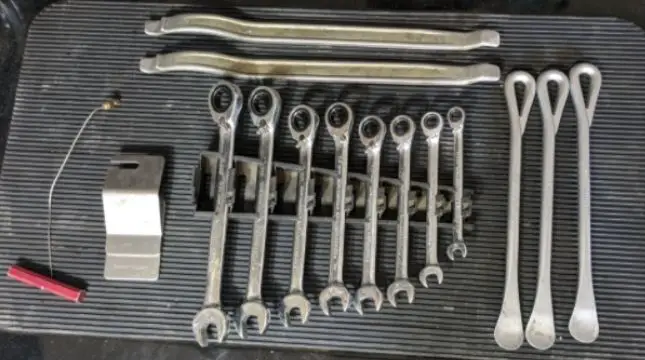
For changing a dirt bike tire, the must-have tools are:
- Tire irons ( preferably 3)
- B tool
- Wrench
- Rim protectors (if you don’t want scratch in your rims)
- Blow hammer
- Tire Changing Stand
- Talc Powder/ lubricants
- Safety pair of gloves
Ways To Change Your Dirt Bike Tire:
The task is mainly of two-parts; taking off the tire and installing another one. At first, manage the essential tools that have been mentioned above. And follow these simple and easy steps to change your dirt bike tire at home.
Part A: Taking Off The Tire:
- Let the air out: Remove the valve stem cap and trader valve to let the air out of the tire.
- Loosen the rim lock:To do this, back it off to the most. But don’t remove it.
- Breaking the bead from the rim: Press in the downside on 180 degrees away from rim lock. Use bodyweight to apply pressure. Use tire iron and pry it away from the rim.
If you can’t get the job done with a tire iron, then just apply the body weight and use your hands.
After one side is done, flip the tire, and do the same thing on the other side as well.
- Getting the tire off the rim: Start by applying the lubricant to the bead. Spray the lub above it. Lubricants help to slide the rim off and helps the tire spoons to grab the bead.
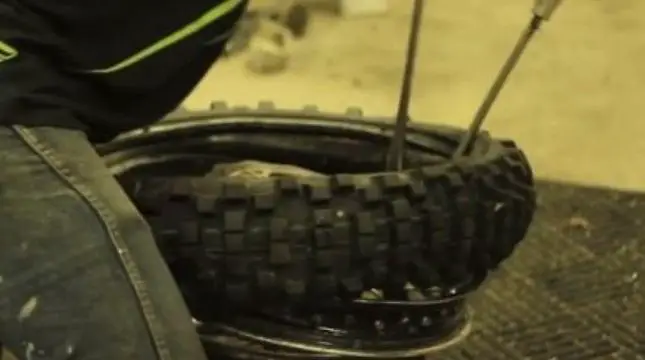
After applying the lube, we can start removing the tire. Start away from the rim lock. Use tire irons ( 3 tire irons suggested).
- Insert one tire iron in between the tire and rim. Use the curvy side of the tire iron, which is facing down while doing this. This will help grab the bead of the tire and work it over the rim’s boundary.
- While inserting the tire irons, make sure to place them at a distance of five inches away from each other.
- Take the center iron and start applying pressure. While doing this, push down on the opposite side of the tire. Apply a little more weight with the tire iron. This will make sure to get as much of the bead of the tire into the drop center.
- Apply pressure using the three tire irons one by one towards the center. While doing this, if you face any difficulty, make sure to get the tire into the drop center as sure as possible.
- Now remove the spoons. Then go about five to six inches away from the starting of the beads. Start from the right of the rim lock.
- With a spoon, remove the tire from the rim.
- Flip over the tire. And repeat the same technique on the opposite side of the tire.
- Now, stand up the tire in the stand. Add the valve stem towards the bottom area of the tire. Apply pressure, push down on the rim and begin to peel the tire off the rim.
- Now pull the rim from the tube. And it’s done.
So you’ve removed your bike tire. Wasn’t it simple? But your whole job isn’t done yet. We’ve only accomplished the first task.
The next task is to replace the old tire with a new one. Well, we understand the job is stressful. So take a break and start to work again.
Part B: Installing The Tire:
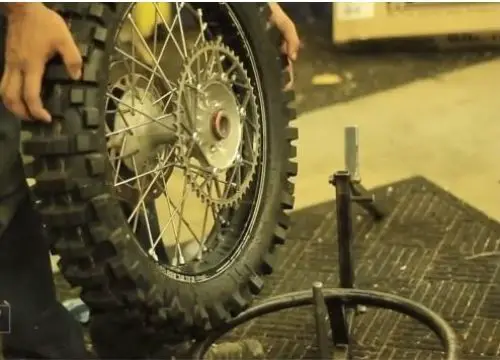
- Aligning up the tire: First, you need to check if your tire is directional or not. After that, align up the tire with the direction of rotation of the wheel of the bike.
- Lubbing the tire: Apply the lubricant spray in the inside part of the tire. Make sure that the lubricant reaches each part of the tire. This will help in the gripping while installing the tire.
- Putting the tube inside the tire: Install the Schrader valve first. Fill the tube with just enough air so that the tube can hold it’s shape. This will also save us from getting pinched while installing the tire onto the rim.
Take the tube and gently push it inside the rim. Don’t apply any extra force. The tube will automatically fit inside the tire.
- Mounting it onto the rim: Take the lubricant spray bottle, and lub up the inside side of the tire’s bead.
- Find out the hole in the rim that’s going to receive the valve stem from the tube.
- Pull the tube just a little bit. Locate the hole and slide valve stem and then through it.
- After getting this through it, take the valve stem nut. Now just barely thread it on to the valve stem.
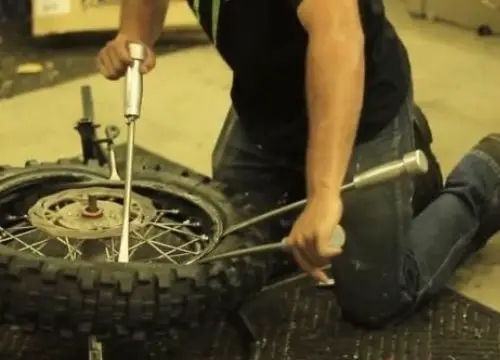
- Working the tire onto the rim: Take the curve tire iron tool from the toolbox for this purpose. The tire iron makes it easier when it comes to getting the tire onto the rim.
Gently use this. You don’t need to apply serious pressure with this. Work your way up to the rim lock.
After coming this far, pull the tire out of the tire changing stand and set it on the ground. This helps us to work the brad up and over the rim lock and get it set into the place.
- Slipping the tire onto the rim lock: Place the two smaller tire irons on both sides of the rim lock. Then lift up on the tire’s bead and slip it over the rim lock.
You can’t press up against the rim lock once you reach this point. Now, release the tire irons. That’s it. You got the bead of the tire sitting in the right spot.
- Now you’ve got the other side of the bead into the place. You can begin to work on the other side of the tire. Spray down the bead with the lubricants first.
- Start right to the valve stems. Use two smaller tire irons. Insert them into the wheel about five or six inches apart from each other.
- Once you’ve got those in place, you can go ahead and begin to work the tire over onto the rim.
- Placing on the rim: Take the tusk motorcycle tire bead tool and place this into the rim. It’s going to press down on the bead.
- Insert one of the spokes. If you are wondering what this tool is going to do, this tool will help to keep the bead down into the drop center as you begin to work on this side of the bead of the tire back onto the rim.
- Now you’ve to place your way to the rim lock. To do this, place the wrench back into the rim about four inches apart from the previous one.
This is a very crucial part. Take your time so that you don’t accidentally pinch the tube. So be very careful.
- The tusk bead tool helps keep the tire’s bead seated on the rim while working around the wheel.
- Once you get close to the rim lock, press the rim lock in towards the tube. Now Grab the tire iron, take another small bite.
You can now have it seated correctly underneath the rim lock and.
- If you can’t insert the tire iron, press on the tire’s sidewall, and it should pop over the rim.
- Inflating the tire for inspection: Remove the bead tool and inflate the tire and see the bead.
While filling the tire, make sure to check the sidewall of your tire and reference the max pressure and don’t exceed it.
- Inspecting the bead and setting rim lock: You need to check the bead to make sure you’ve got a nice and uniform bead on both sides of the tire.
If the tire passes all the previous tests, go ahead and set the rim lock. Set the rim lock nice and tight.
- Applying tire pressure and installing the valves: Now set the tire pressure. While setting the tire pressure, set it to your desired psi.
Install the valve stem cap. Once it’s complete, bring the valve stem nut up to the cap and tightened it.
Conclusion:
So that’s it. That’s really all there is to when it comes to changing out a tire on a dirt bike. Hopefully, the process that we’ve shown you here today really helps to clear out some confusion for you and makes changing out your dirt bike tires a lot easier.
Thanks for being with us the whole time. We understand the article was a long one. If you have anything to know other than this, feel free to ask. Good luck changing your dirt bike tire on your own.